

of leaky taps and white thin sticky tape....
I learnt something new last weekend and thought that it will benefit others if I were to share it here. So here goes:
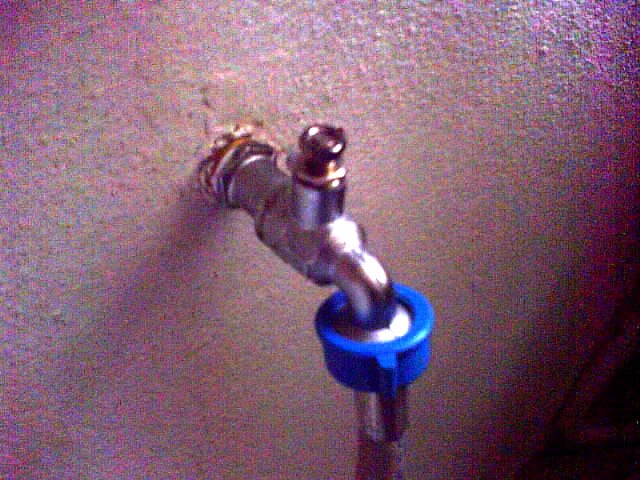
Home DIY: Repairing a leaking tap.
Here are the steps in repairing a leaking (Faulty tap)
Step 1: If it is not broken, don’t gatai gatai and go around playing with it!!
If you followed step 1. probably 80% of your problems are solved.
For the rest of the 20%, here’s what you do.
Tools needed:
1. a big ‘spana’ (I don’t know what is the correct spelling but it is basically a big tool)
2. a fair bit of strength. (if you don’t have that, go work out and come back to continue after a few weeks.
3. some common sense (unfortunately I did not prepare this tool during my exercise, so I am putting it here for the benefit of others)
Materials needed
1. Probably a new tap
2. very most probably, the yellow pages or number of the nearest plumber
3. Those white thin and sticky tape
4. running water (for testing purpose)
Once you have got all the tools and materials follow these steps.
1. Do a sanity check to assess the situation: Does anyone know about it? If no one knows about it, pretend you did not see it, keep the tools, walk away, wait for someone else to discover it and blame it on them.
2. If people have already know about it and blame you for it then curse your misfortune and proceed to the next step.
3. Assess if the if the leak is major (e.g, water gushing out and people running for their lives) or minor (e.g., small drip that seems to sound louder when you are trying to sleep). If it is a minor leak, proceed to step 3a. else go to step 4.
a. Fill up any tanks that you can find, take your shower if you haven’t and accumulate any drinking water that you might need. Just in case you botch the repair job and is left without water.
4. Go to the main tap and turn it off. This will stop the leak, but will also means that you will be cut off from fresh water supply.
5. Then, take the big ‘spana’ and remove the faulty tap. (Tip: righty tighty, lefty loosey)
6. then take the new tap and the white thin and sticky tape and wrap it around the screw thread of the new tap. Use generously because the tape will compress.
7. then fix the new tap onto the pipe. Use the big spana at it is fixed securely.
8. There you go, you have successfully fixed your leaky tap.
9. But before going to turn on the main supply, make sure that you turn on the tap that you had just fixed. This is to release any trapped air in the pipes. Very important, because if you don’t do so the trapped air will be pressurized and screws up your new tap. Once you have done so, turn on the main water supply.
10. Finally, get naked and enjoy the fruits of your labour by having another shower!
Note:
If something goes wrong in any one of the 10 steps listed above, Shout "Oh Sh*t! Oh Sh*t!" and call the plumber (refer to item #2 in the list of materials needed)

Ta daaaaaa.....
Home DIY: Repairing a leaking tap.
Here are the steps in repairing a leaking (Faulty tap)
Step 1: If it is not broken, don’t gatai gatai and go around playing with it!!
If you followed step 1. probably 80% of your problems are solved.
For the rest of the 20%, here’s what you do.
Tools needed:
1. a big ‘spana’ (I don’t know what is the correct spelling but it is basically a big tool)
2. a fair bit of strength. (if you don’t have that, go work out and come back to continue after a few weeks.
3. some common sense (unfortunately I did not prepare this tool during my exercise, so I am putting it here for the benefit of others)
Materials needed
1. Probably a new tap
2. very most probably, the yellow pages or number of the nearest plumber
3. Those white thin and sticky tape
4. running water (for testing purpose)
Once you have got all the tools and materials follow these steps.
1. Do a sanity check to assess the situation: Does anyone know about it? If no one knows about it, pretend you did not see it, keep the tools, walk away, wait for someone else to discover it and blame it on them.
2. If people have already know about it and blame you for it then curse your misfortune and proceed to the next step.
3. Assess if the if the leak is major (e.g, water gushing out and people running for their lives) or minor (e.g., small drip that seems to sound louder when you are trying to sleep). If it is a minor leak, proceed to step 3a. else go to step 4.
a. Fill up any tanks that you can find, take your shower if you haven’t and accumulate any drinking water that you might need. Just in case you botch the repair job and is left without water.
4. Go to the main tap and turn it off. This will stop the leak, but will also means that you will be cut off from fresh water supply.
5. Then, take the big ‘spana’ and remove the faulty tap. (Tip: righty tighty, lefty loosey)
6. then take the new tap and the white thin and sticky tape and wrap it around the screw thread of the new tap. Use generously because the tape will compress.
7. then fix the new tap onto the pipe. Use the big spana at it is fixed securely.
8. There you go, you have successfully fixed your leaky tap.
9. But before going to turn on the main supply, make sure that you turn on the tap that you had just fixed. This is to release any trapped air in the pipes. Very important, because if you don’t do so the trapped air will be pressurized and screws up your new tap. Once you have done so, turn on the main water supply.
10. Finally, get naked and enjoy the fruits of your labour by having another shower!
Note:
If something goes wrong in any one of the 10 steps listed above, Shout "Oh Sh*t! Oh Sh*t!" and call the plumber (refer to item #2 in the list of materials needed)
Ta daaaaaa.....
posted by Duckie at
4:51 PM
![]()
